
Contents
In this article, we will tell you how to take a screenshot of a computer and capture all or part of the screen or screenshot. This is a process where you take a snapshot of what you see on the monitor and save it as an image on your computer. So you can very quickly send it to someone, share it, or attach it to a document as if it were a stock photo.
This is a handy feature, and there’re many tools or ways to better adapt to your needs. We show you the best ways to record what you see on your screen, whether to record something you see, add a cutout to a document, or send a screenshot to support.
Easy Ways to Take Screenshots on Windows
Know that there’re several ways to take a picture of your computer screen. You’ll wonder why there’re so many ways to do the same thing when one is enough. The answer is that each has its advantages and choosing the most suitable one can save you a lot of time.
All are equally simple, but each serves a particular need, so we’re not showing you just one. So you can take advantage of what is most beneficial to you and crop or edit newly created images after snapshot creation, reopen them to insert into documents, etc. Check out these three quick and easy ways, then choose how to take a screenshot on your Windows computer.
How to Take a Screenshot of a Computer?
If you’ve ever wondered how to take a screenshot of your computer, you’ve come to the right place. You can use the built-in Windows “Snipping Tool” to copy the screen’s contents. However, you might better use a third-party screenshot application, which usually allows you to crop the toolbar. You’ll find many easy-to-use methods here.
Once you’ve captured a screenshot, you can save it in PNG or any other format you want. Then, you can use the screenshot as a file and paste it into your document or image processor. You can also use the Print Screen Key, which saves the screenshot to the Clipboard. To save a screenshot in another format, use Ctrl+C to paste it into another application.
To take a window screenshot, click the “Print Screen” button in the top-right corner. A preview of your screenshot will appear. You can edit this screenshot as well. You can also use the Game Bar overlay, which is accessible by pressing Windows Key + G. This overlay will allow you to take a screenshot of any window or program and record a video. The microphone icon is available on all versions of Windows.
Alternatively, you can click the “One-Window” screenshot button. It will take a screenshot of the active window. It must be in front of the other windows. If you’re using Windows 8, you can search for “Paint” in the Start window. If you’re running Windows XP, this option will be missing, and you’ll have to select the “All Windows” tab.
How to Take a Screenshot with the Keyboard?
The first way we see it’s the more classic one-key function, which isn’t missing on any Windows-powered computer. To make the screenshot with the keyboard, you can follow these steps:
- Press the Print Screen key (or Print) where the computer saves the screen to memory
- Open Paint or any other program where you want to put the snapshot
- Right-click on the desired location
- Select Paste (or use CTRL + V) to insert the saved image
The translated Print Screen key means its print screen and is usually located at the top right of the arrows or the function keys above the numeric keypad. More compact keyboards, such as laptops, usually have function keys that start with F, and you must hold down the FN button to use it. However, if you can’t find it anywhere, remember that sometimes the button may have the words Stamp, Prt Sc, or similar.

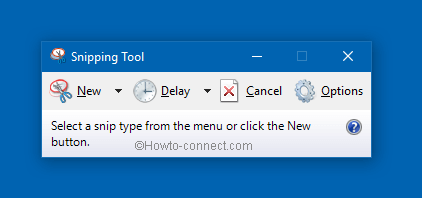
Use the Snipping Tool
Whether for business or education, they often include images and graphics found on the Internet in their documents. However, if you can’t download them and don’t want to crop every single screenshot you take, you can use the Windows Snipping Tool. Also, the Snipping Tool is a beneficial program that lets you capture a portion of the screen you’ve defined and save it as an image or attach it directly to an email or even an Office suite.
This software is available in all versions, including Windows 7, 8, and 10, and you have to search it in the search bar. You will find it immediately. To take a screenshot, strictly follow these steps:
- Open Snipping Tool from the windows command bar
- Select New from the button in the top right
- Click on the section you want to start with the left mouse button and hold the button
- Drag the slider to outline the part of the screen you want to record.
- Save the image with a name or repeat the process if you didn’t get what you needed.
How to Take a Screenshot of a Web Page?
A third way is to use various browser extensions to save parts of web pages in just a few clicks. This method is simple, but add-ons need to install first. Therefore it is highly recommended above all for those who want to save images of the pages and websites they visit frequently.
Most used browsers have excellent extensions that can capture all or part of the page you are reading and save it in a folder of your choice. If you’re using Google Chrome, we recommend installing the ScreenShot Capture & Editor Tool.
For those who use the Mozilla browser, you can try the Easy Screenshot extension or utilize the browser’s built-in functionality called Firefox Screenshot. Finally, there is Capture Webpage, a versatile add-on for those who own Opera.

How to Take a Screenshot on Mac?
Those who have apple computers don’t have Print Screen on their keyboard, but this doesn’t mean that it isn’t possible to make a screen on Apple computers. The procedure in MacOS is perhaps even more straightforward than in Windows, as it automatically saves the image to the desktop.
Also, on Macbook and iMac, this function can be done with the keyboard, using the Command + Shift + 3 key (or 4 to capture only part of the screen), or with the Snapshot application integrated into the operating system.

It will help if you read our article, Best Assembled Computers Configured for Gaming.


